Converting a midarm frame for CNC control with LinuxCNC, generating gcode with Fusion 360
Since this gets a bit long, I’ll include links to each section.
- Machine In Operation (Demo)
- Backstory
- Electronics
- Drive System – X Axis
- Drive System – Y Axis
- Sewing Machine
- Generating gcode
- Work Samples
- My Wife’s Quilting Instagram
Product links are to exact listings I used in this build. As an Amazon Associate I earn from qualifying purchases.
Machine In Operation (Demo)
Backstory
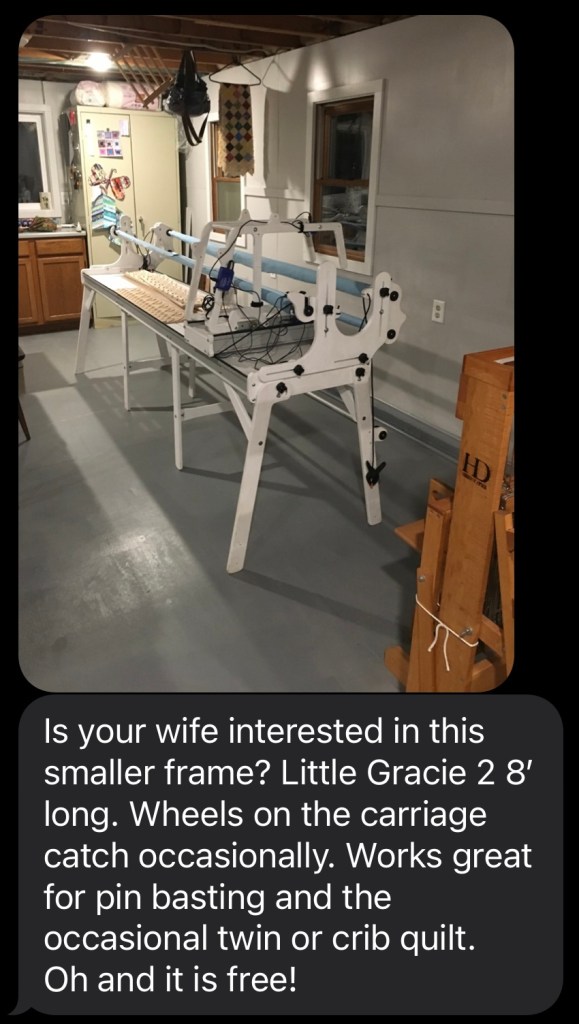
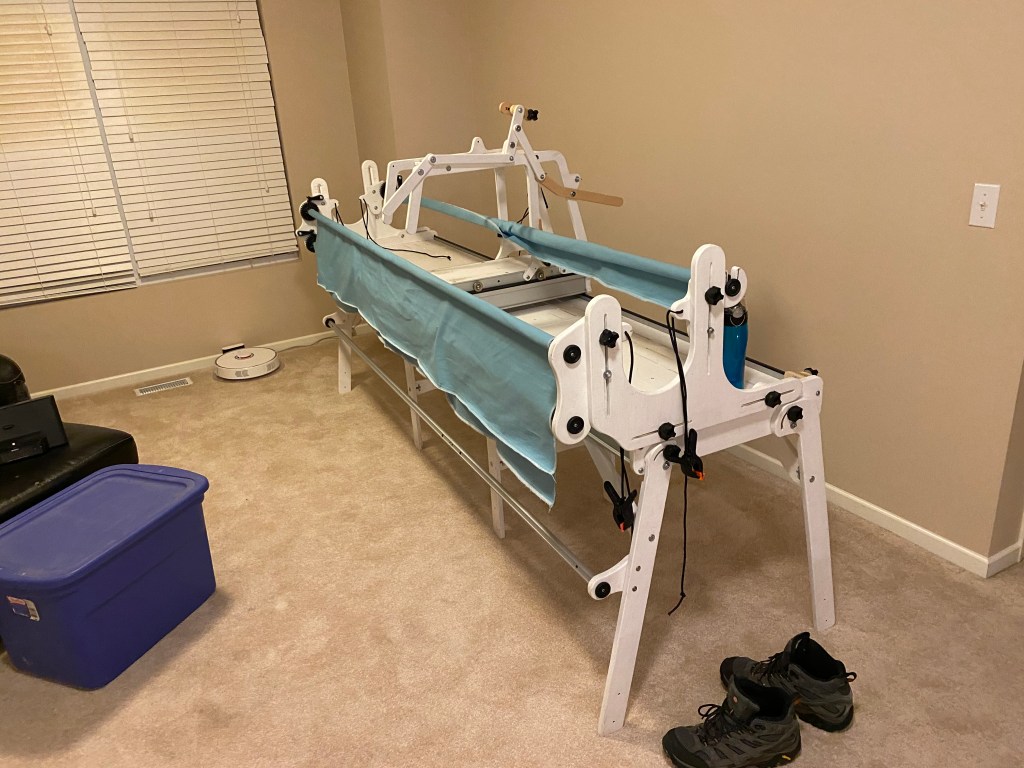
My friend’s wife also quilts. She was upgrading and needed to make space for her new machine. That’s how I ended up with a Little Gracie II quilting frame. My wife taught herself to quilt on a Brother PQ1500SL, but wanted to upgrade to a machine with more stitch options. So that freed up a midarm machine. A new stitch regulator, a bunch of tweaking alignment, and replacing some wheels/bearings and we had a midarm machine quilting setup.
It turns out that using a quilting frame takes more patience than my wife has and more skill than I have.
I’ve had some CNC parts since the economic stimulus act of 2008. Specifically, I used my tax rebate to purchase a Keling Technology 425oz-in 3 axis kit with 3x KL4030 drivers, 3x 425oz-in NEMA23 steppers, a 36v power supply, and a C10 breakout board. I had used these parts in a hardware store/dumpster CNC project. My router wasn’t actually useful, so I yanked the steppers for this.
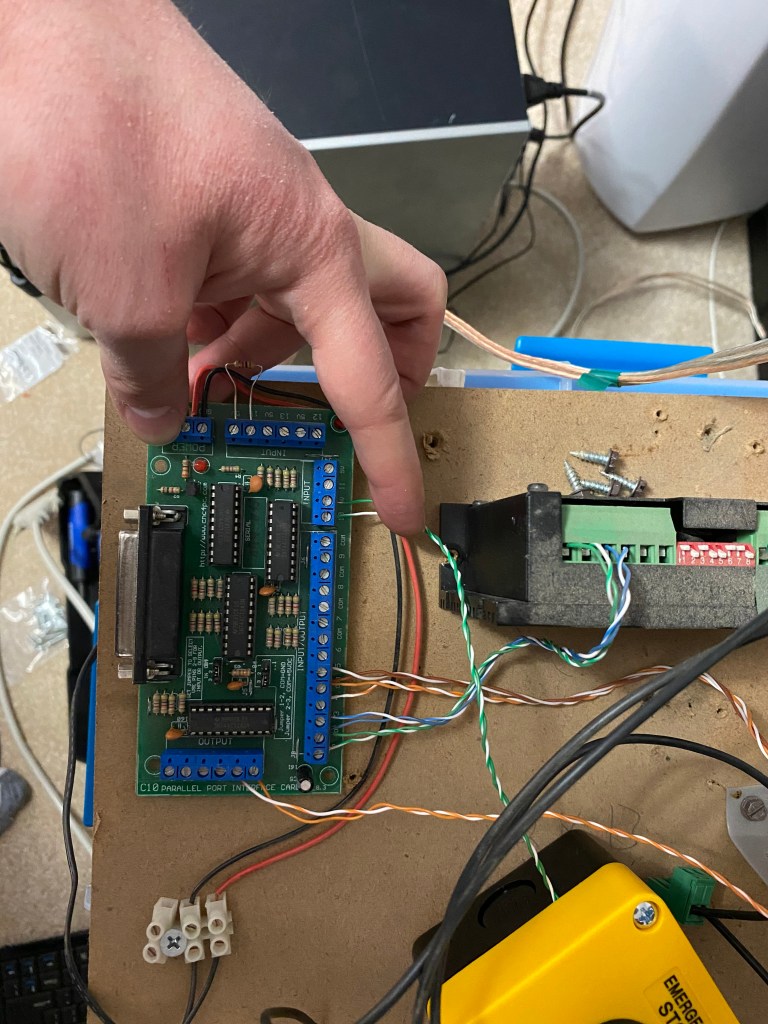
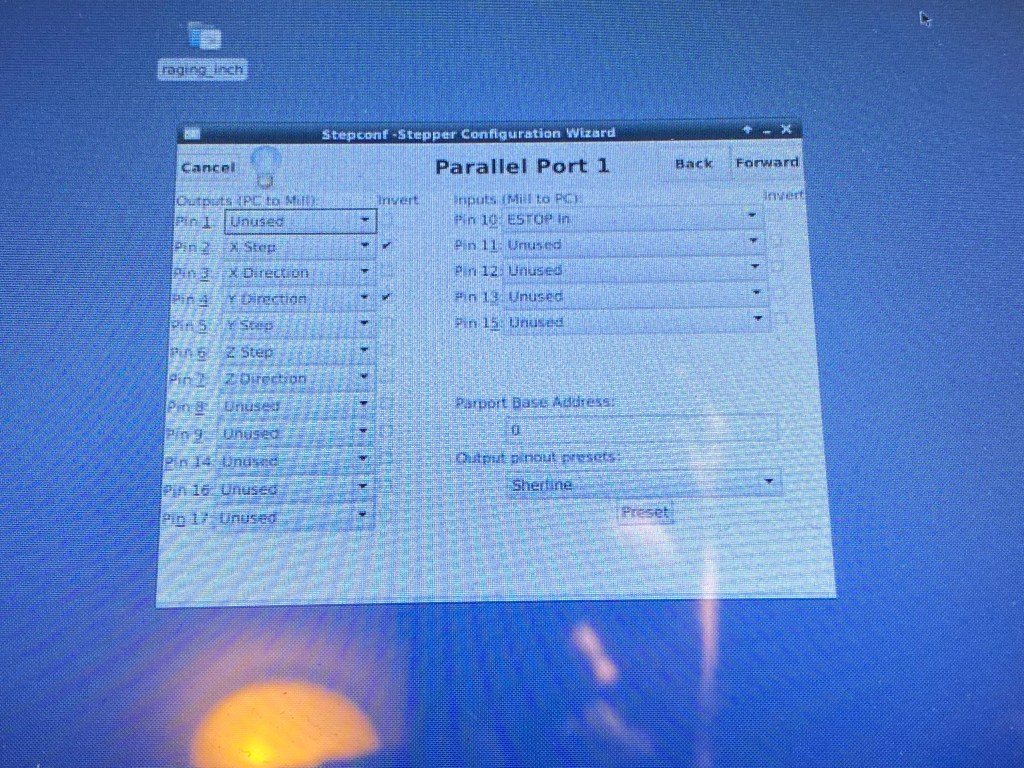
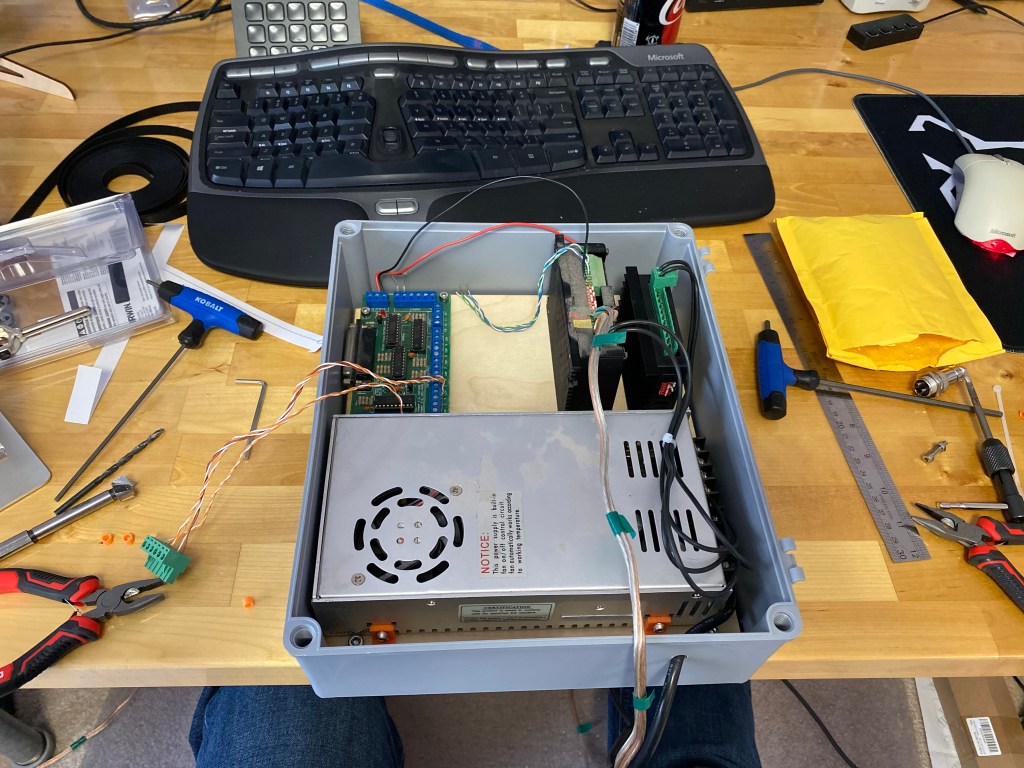
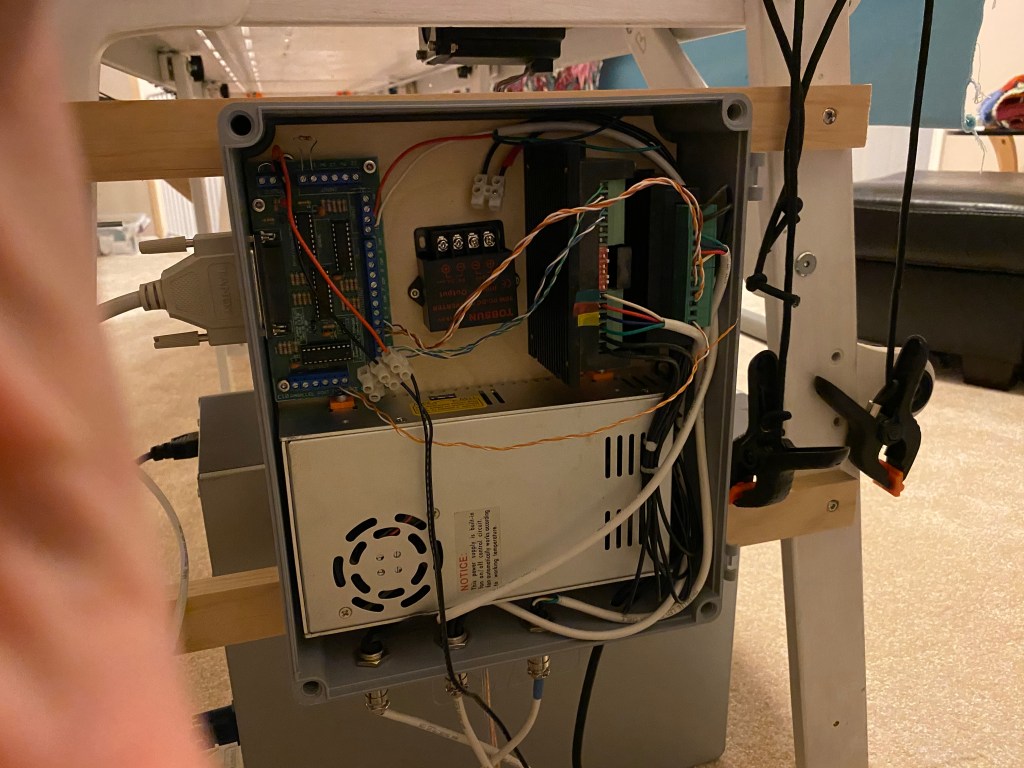
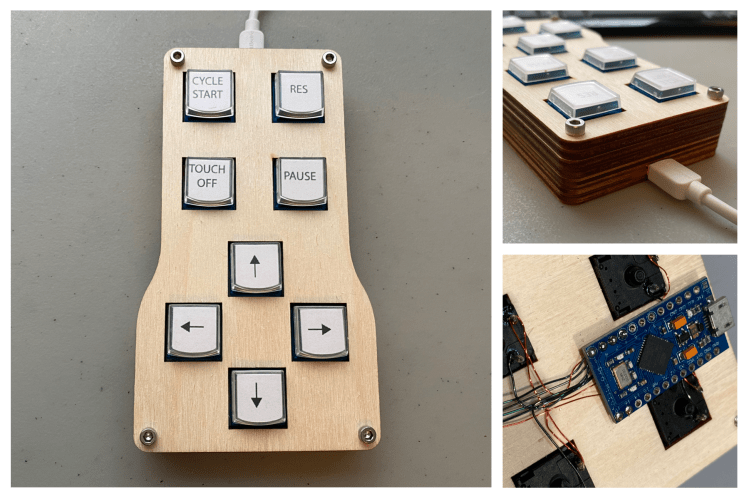
Electronics
This isn’t overly complicated, steppers and drivers are connected according to the datasheets. While only the X and Y axes are driven, I’m pretending there is a disconnected Z axis to make generating gcode easier. There are no limit switches, homing switches, or spindle control. Starting and stopping the sewing machine is done manually. Sewing machine speed is controlled by the stitch regulator.
- 36v power supply
- KL4030 driver
- C10 breakout board
- TB6600 Stepper Motor Driver
- Electronics Enclosure
- 18AWG 4 Conductor Cable
- Aviation Plug Connector
- 18 x 25mm Drag Chain
- Emergency Stop Push Button
- PC with hardware parallel port

Related post: CNC Keypad / Custom USB Keyboard for LinuxCNC
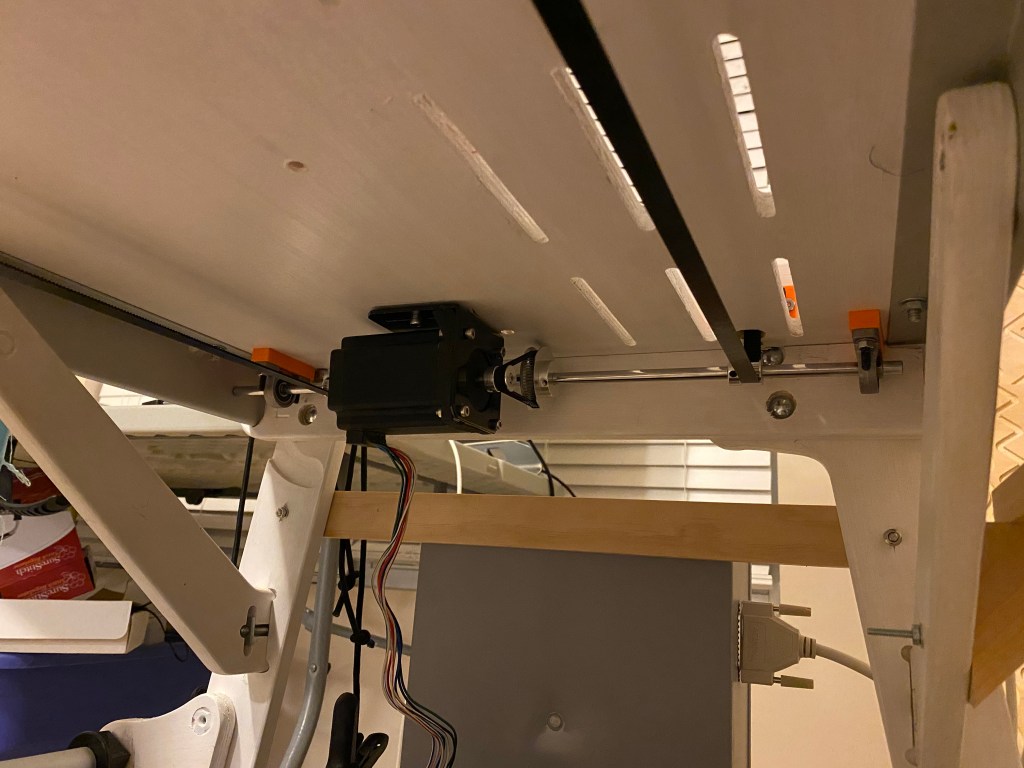
Drive System – X Axis
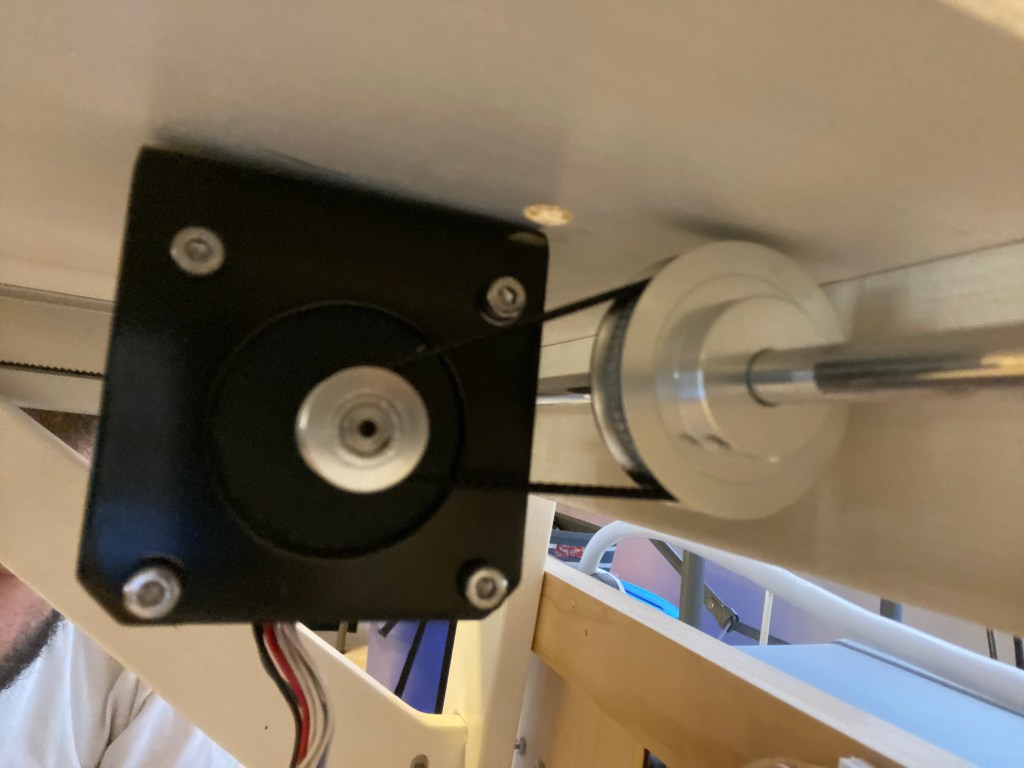
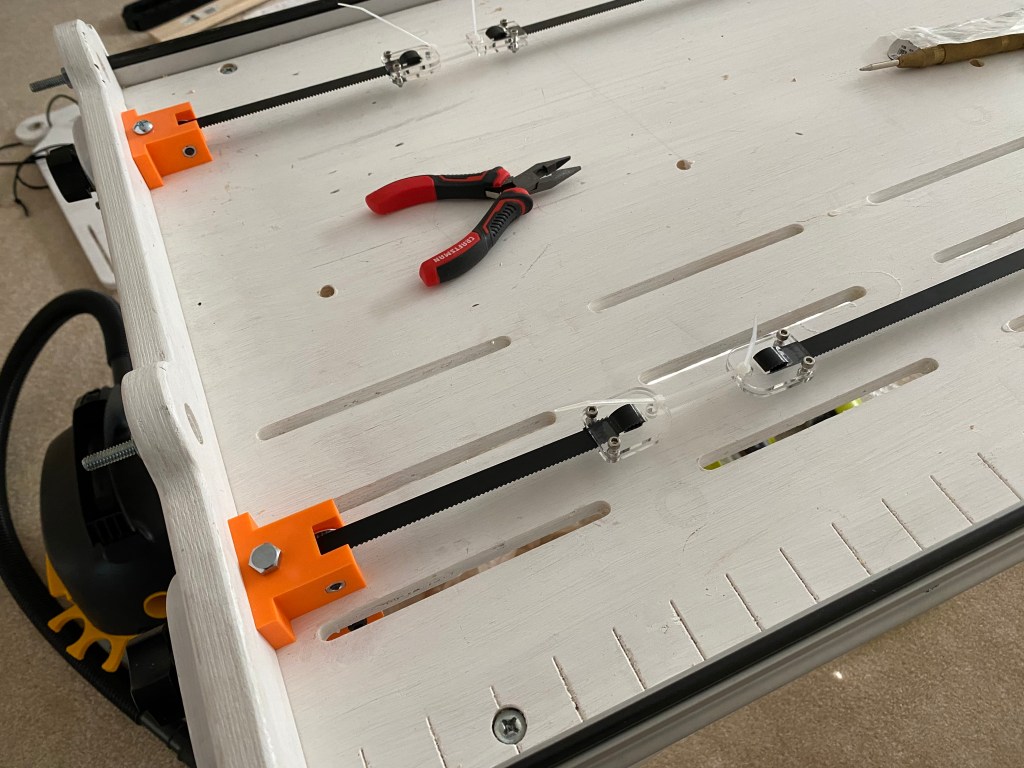
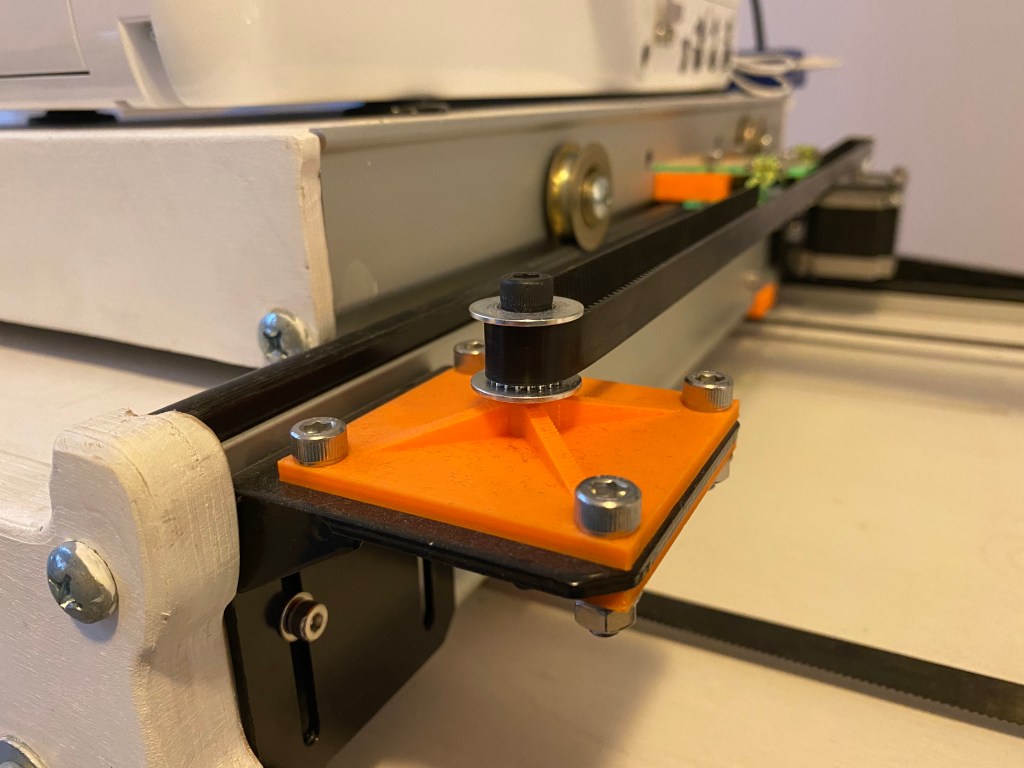
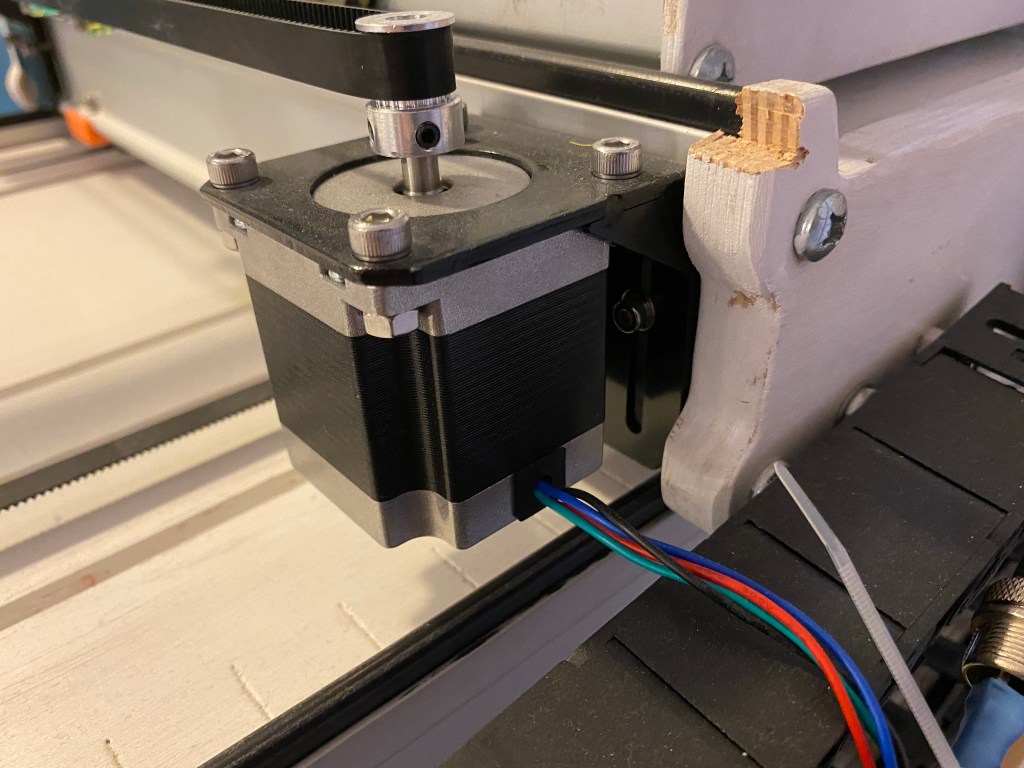
The X axis is a set of 2 parallel belts because I found that moving the carriage with a single point of contact led to too much skew and the rollers binding. To drive both belts, I’m using an 8mm rod held by pillow blocks. Since I have to couple to a shaft, I’m using a 3:1 reduction to further limit acceleration.
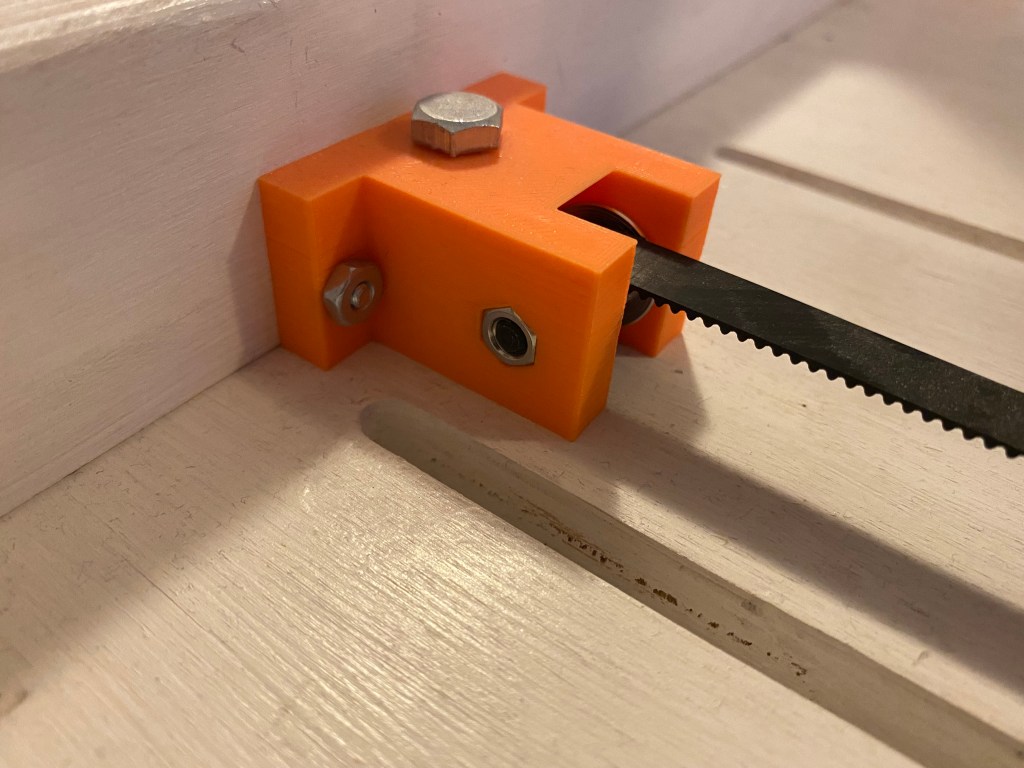
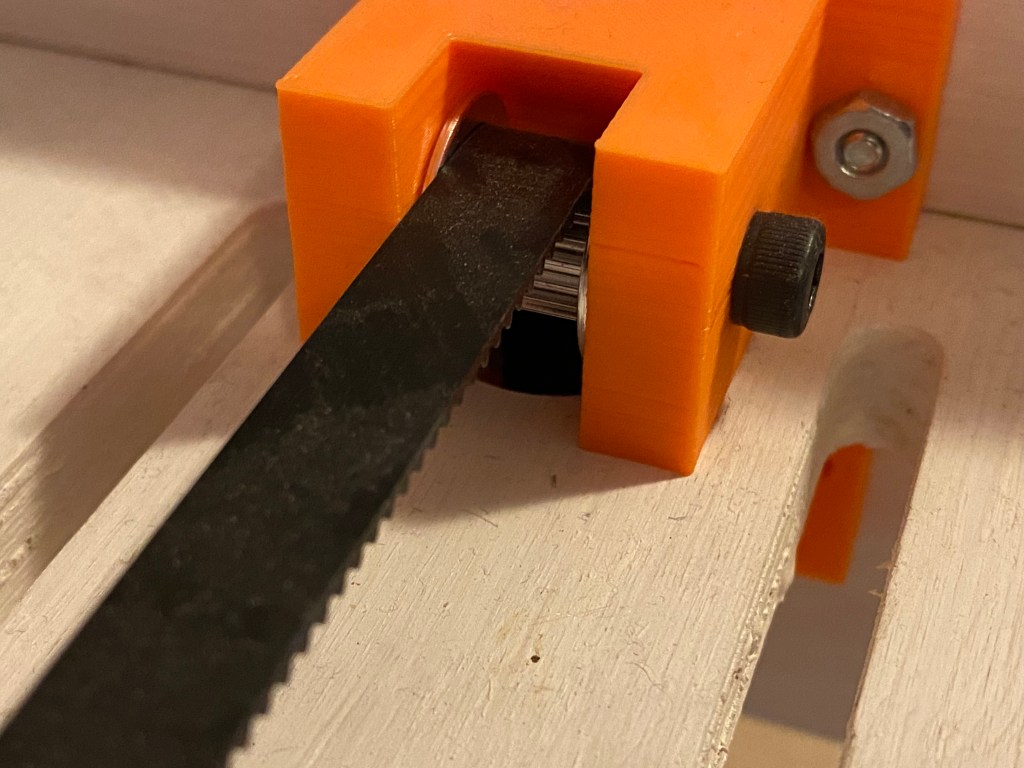
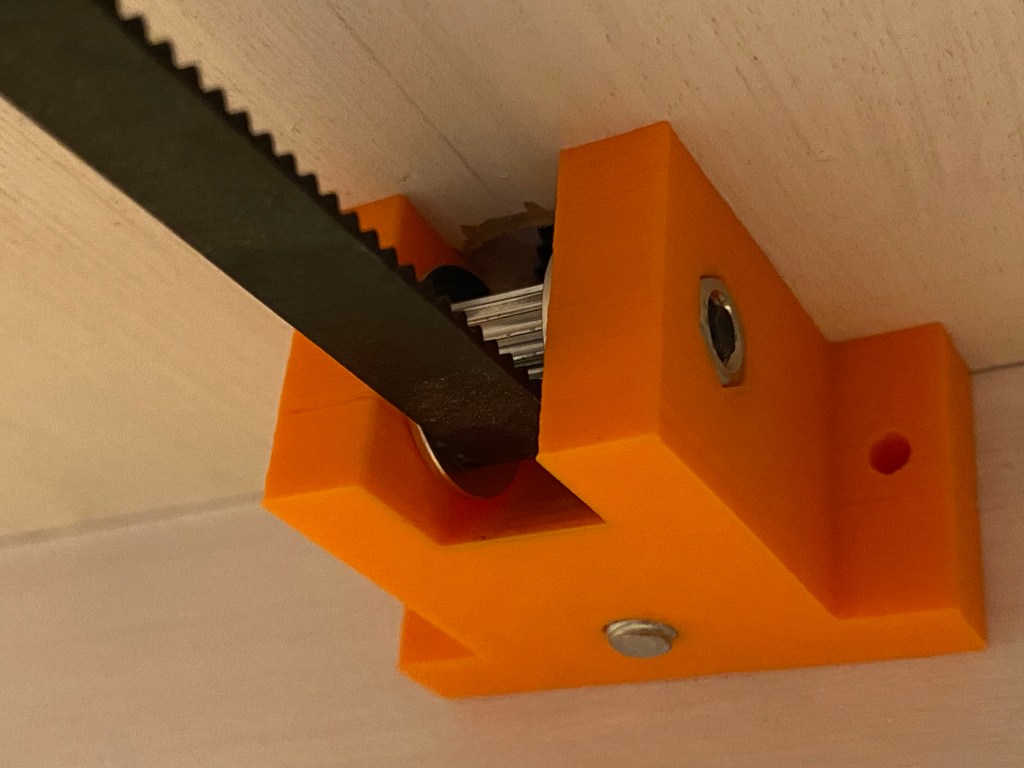
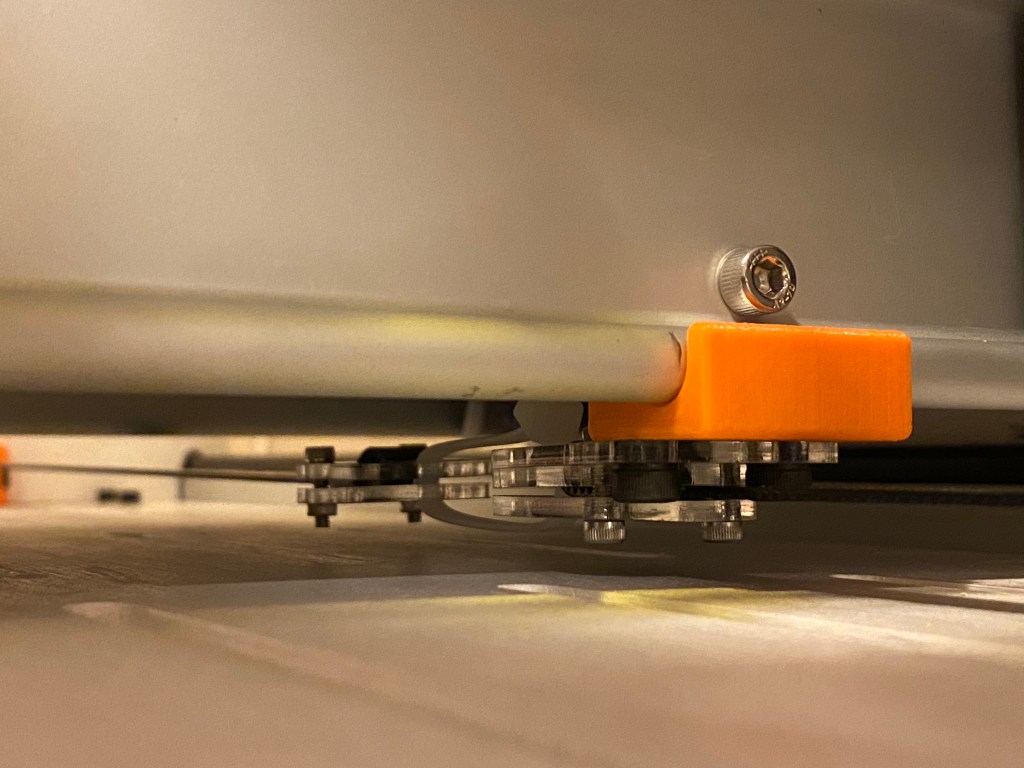
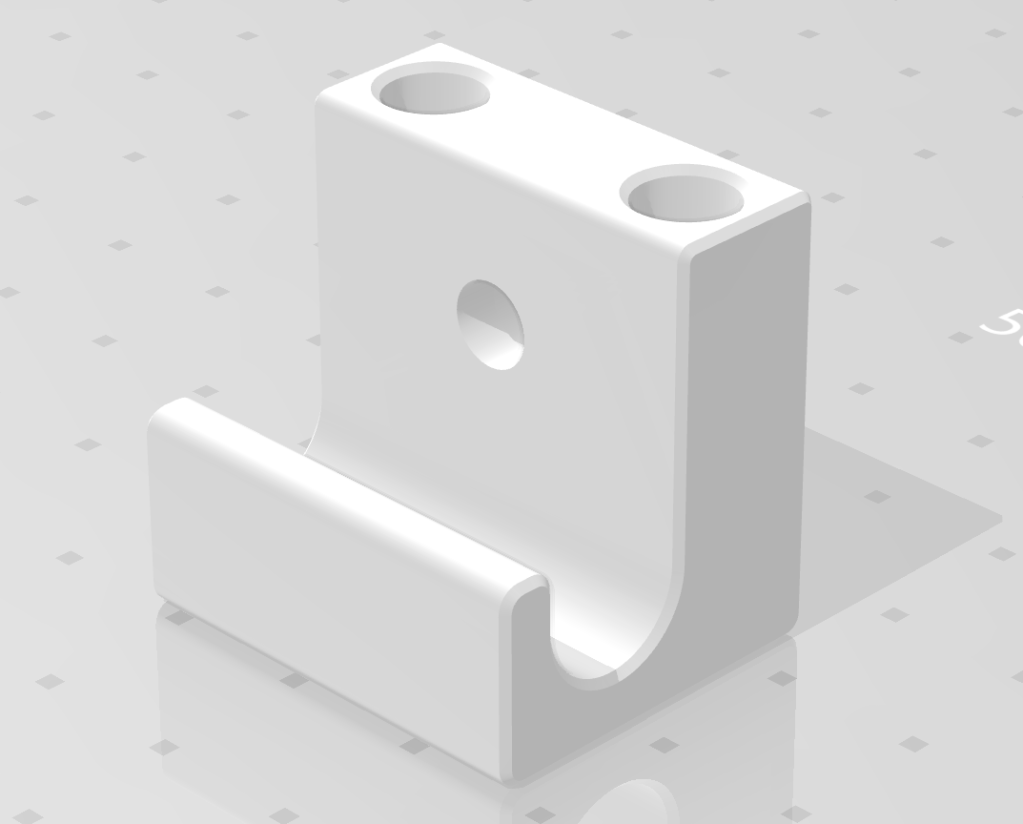
The pillow blocks are spaced down from the underside of the table to allow room for the 60 tooth pulley. The idler pulleys are mounted in 3d printed blocks attached to sides and table, guiding the belt from top to bottom through a 3/4 in hole.
- Keling 425oz-in Nema 23 Stepper
- Nema 23 Stepper Motor Mounting Bracket
- GT2 Belt with Steel Core 10mm wide
- GT2 Pulley 20 Teeth / 6.35mm Bore / 6mm Width
- GT2 Pulley 60 Teeth / 8mm Bore / 6mm Width
- GT2 Belt Length 200mm / Width 6mm
- 8mm x 500mm Shaft
- Pillow Block 8mm Bore
- GT2 Pulley 20 Teeth / 8mm bore / 10mm Width
- GT2 Idler Pulley 20 Teeth / 5mm Bore / 10mm Width
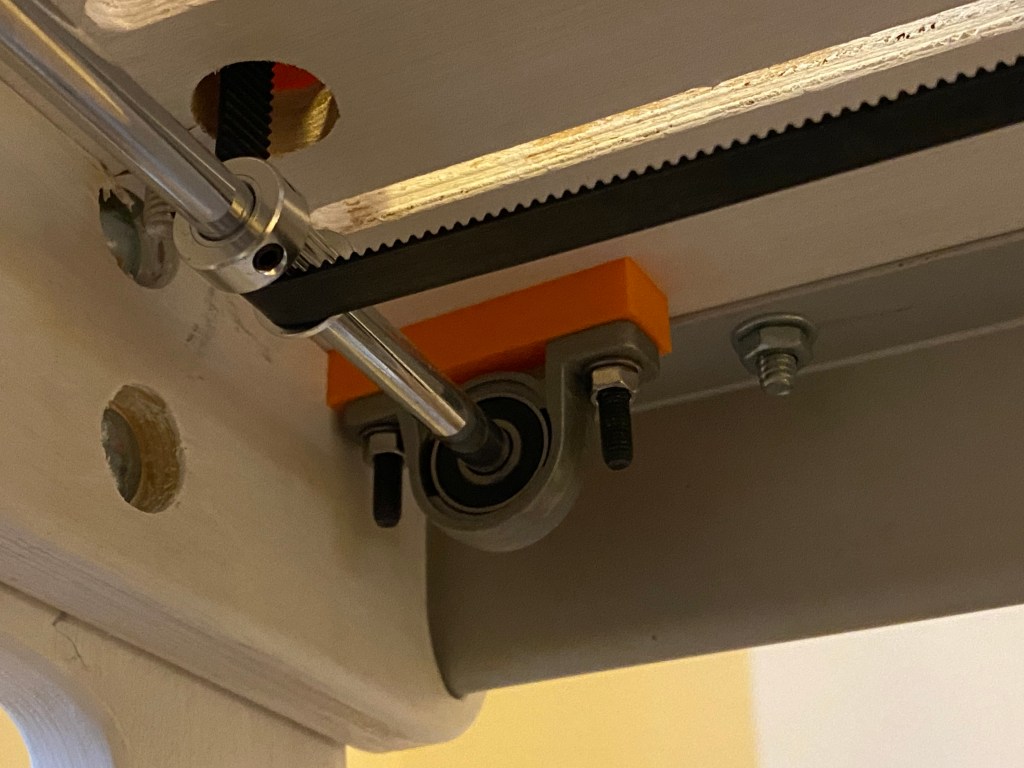
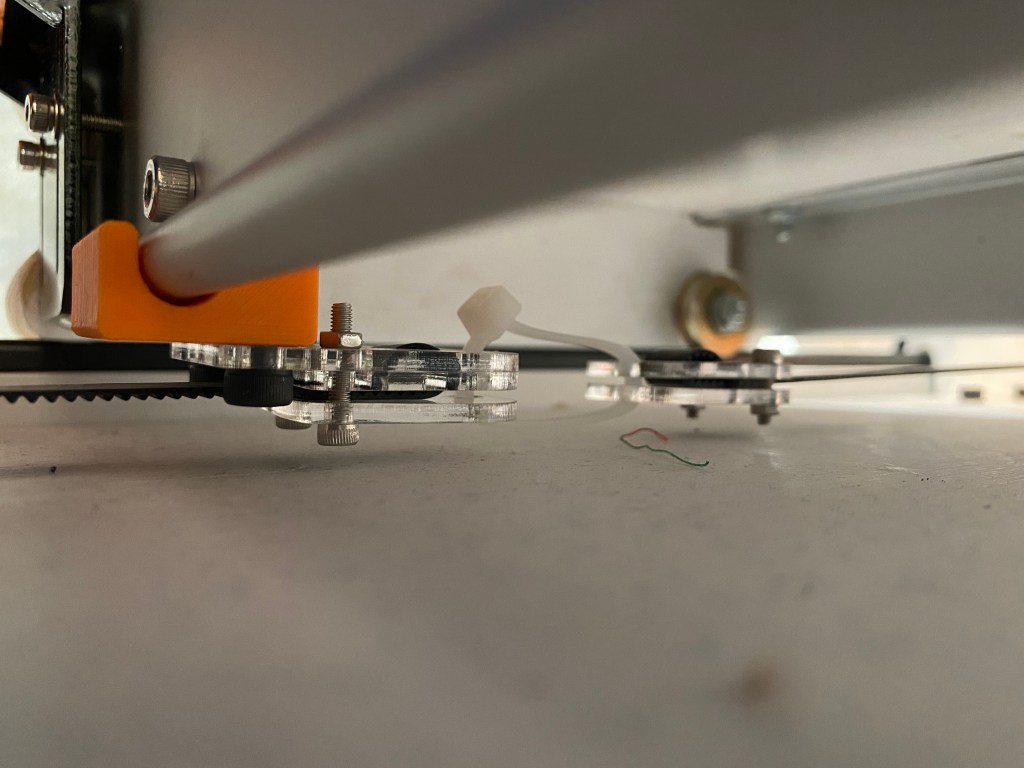
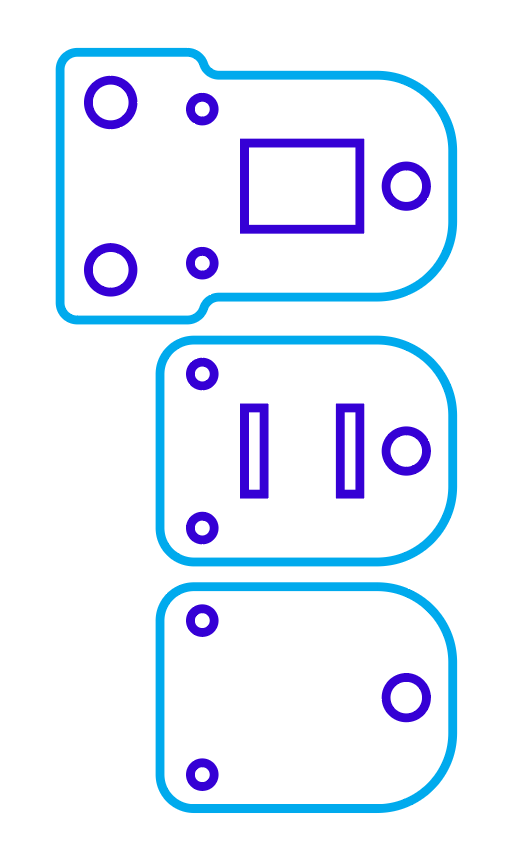
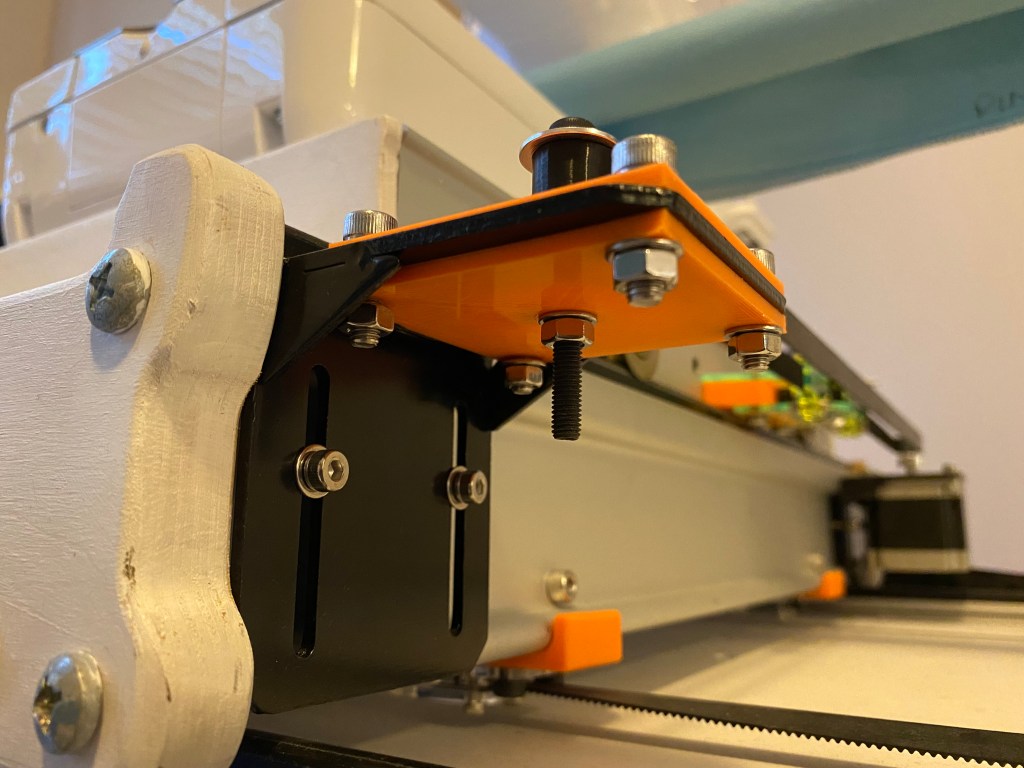
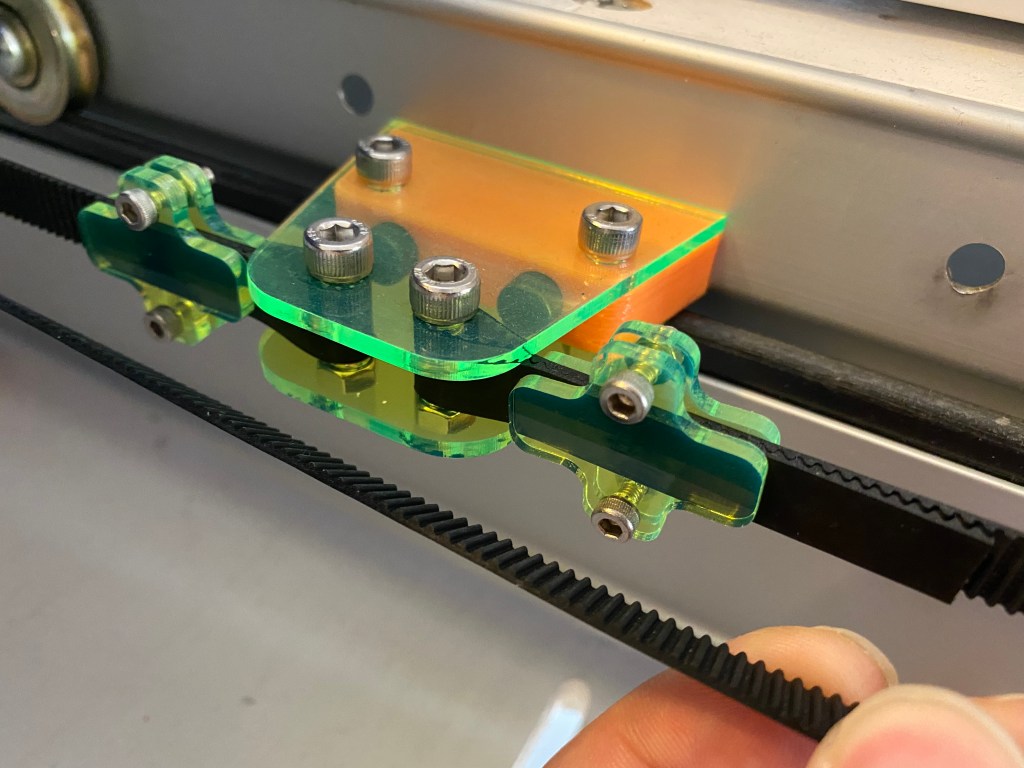
The X axis belts are attached to the carriage at 2 points using a 3d printed bracket and some laser cut acrylic. To tension the belts, I just pulled them tight with zip ties. I don’t want this to be too rigid in case the machines tries to rip itself apart.
To align the carriage after attaching the belts, I used a framing square to set the carriage straight before tightening the grub screws on the drive pulleys on the 8mm shaft.
Drive System – Y Axis
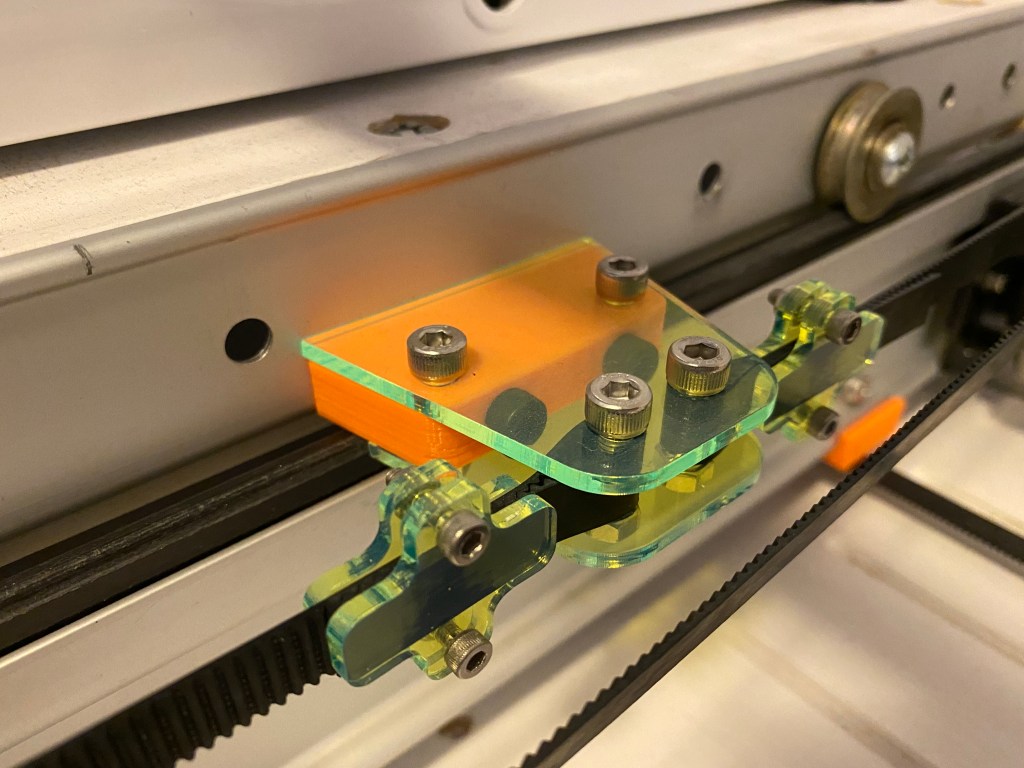
The Y axis is smaller with less weight to throw around so I used a smaller stepper to simplify attachment. I just used steel Nema 23 mounting brackets, attached the stepper with pulley and measured where everything else needed to align. Attached to the carriage by a 3d printed block holding laser cut acrylic. Belts are clamped with laser cut acrylic, wrapped around m4 bolts.
- Nema 23 CNC Stepper Motor 2.8A 178.5oz.in
- Nema 23 Stepper Motor Mounting Bracket
- GT2 Belt with Steel Core 10mm wide
- GT2 Pulley 20 Teeth / 6.35mm / 10mm Width
- GT2 Idler Pulley 20 Teeth / 5mm Bore / 10mm Width
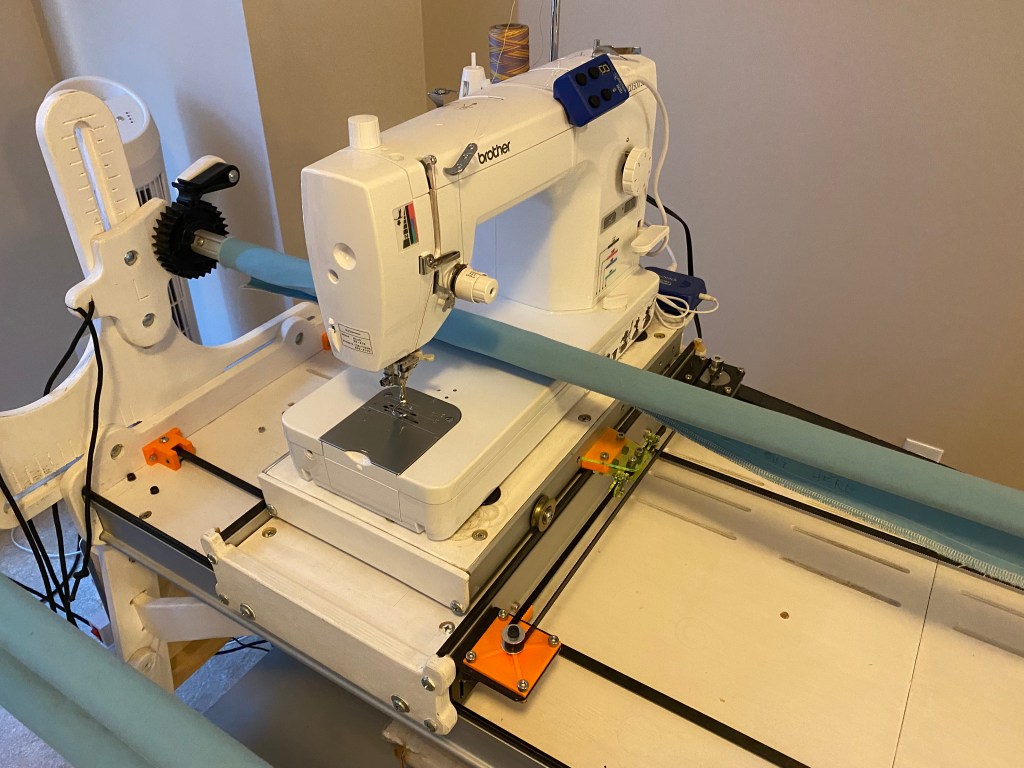
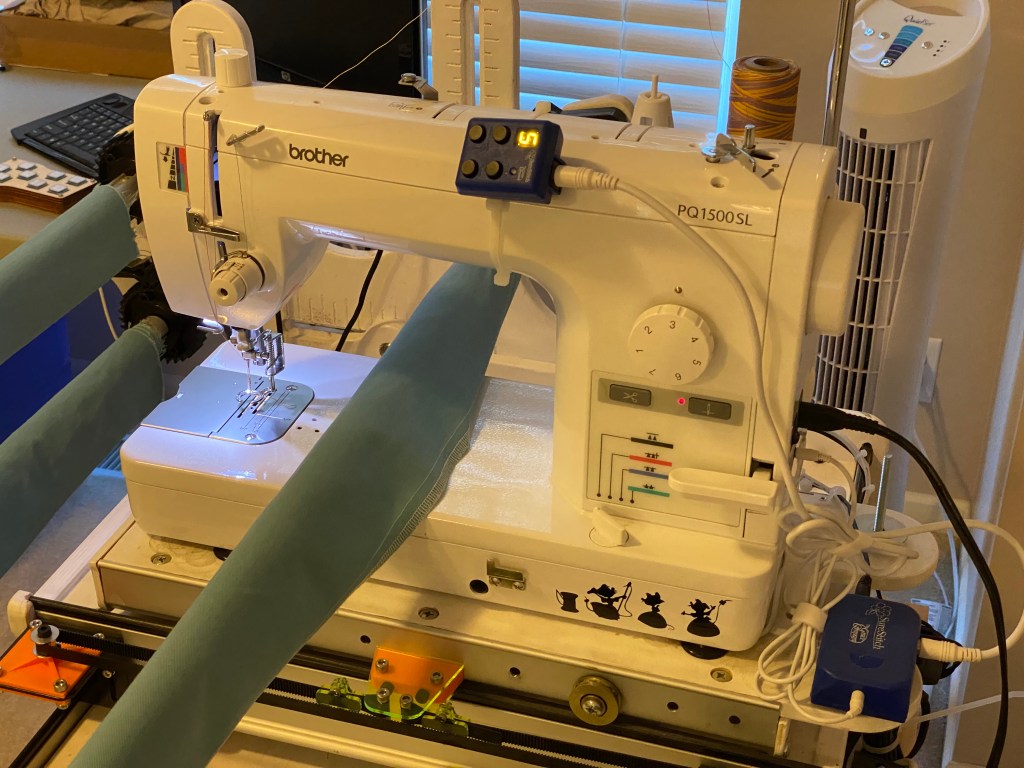
Sewing Machine
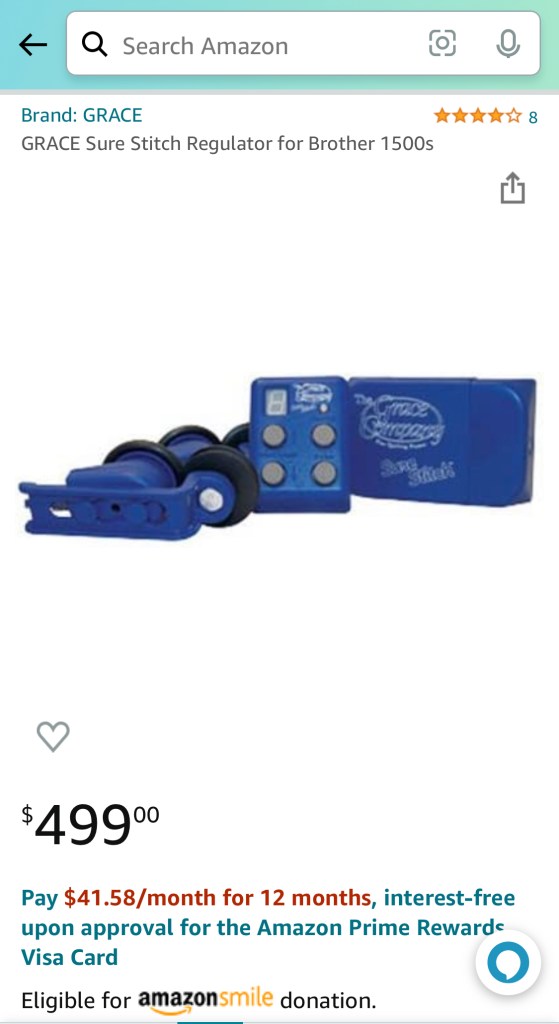
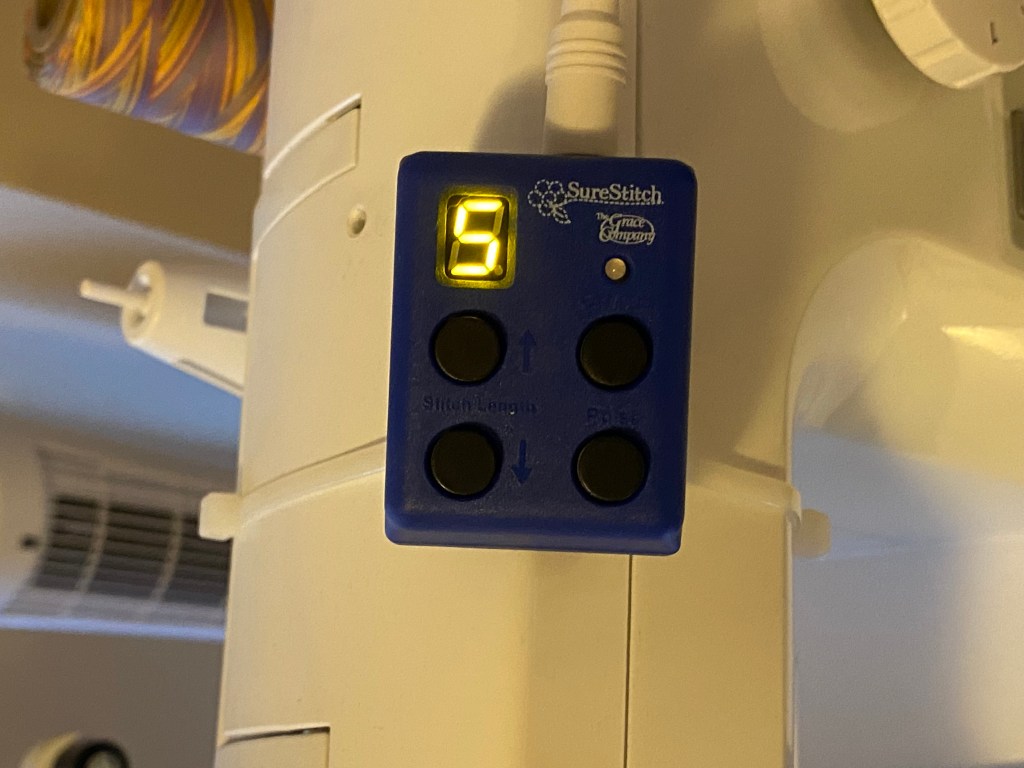
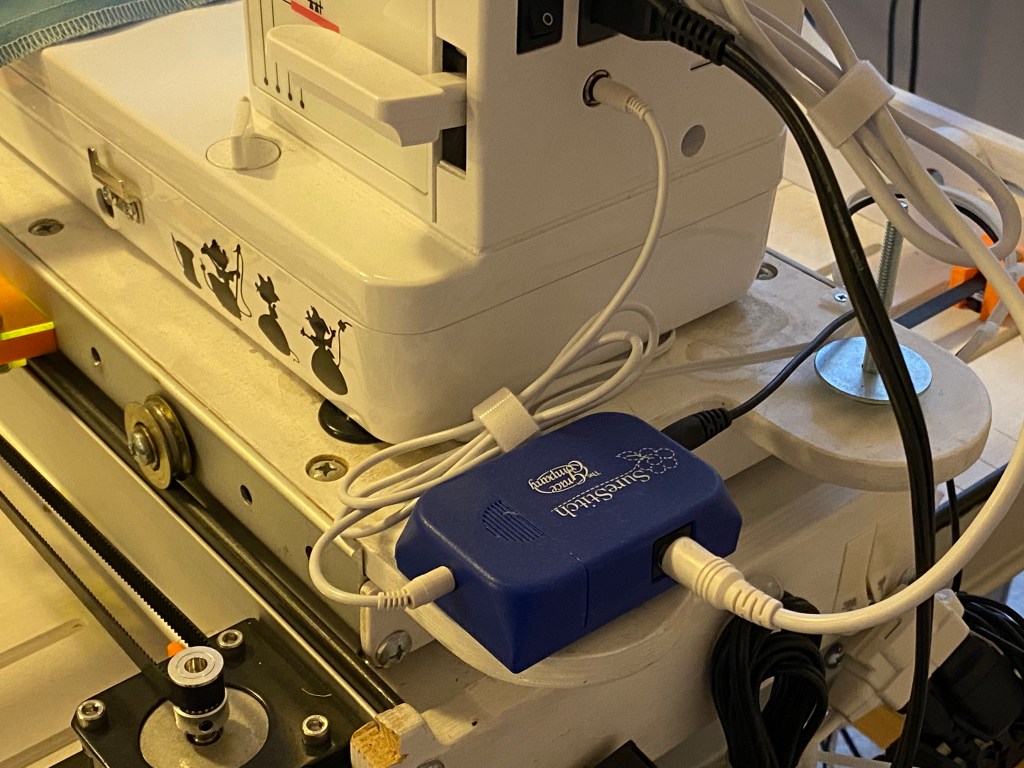
My wife upgraded to a new sewing machine, which freed up her old Brother PQ1500SL. It’s a solid machine, but it only does straight stitches. Perfect for quilting! I couldn’t’ figure out adjusting machine speed so I just bought a new Grace SureStitch Stitch Regulator specific to that machine. It uses encoder wheels against the rollers to sense how fast the machine is moving relative to the frame and speeds up / slows down the sewing machine to compensate. The idea is to have an even stitch length.

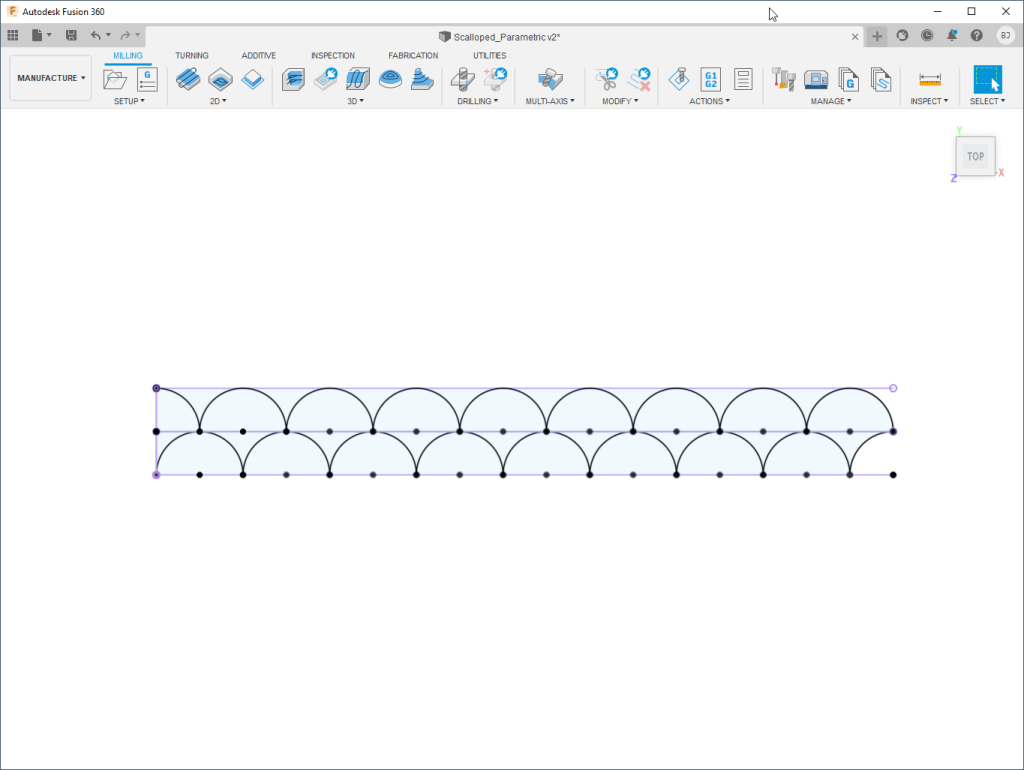
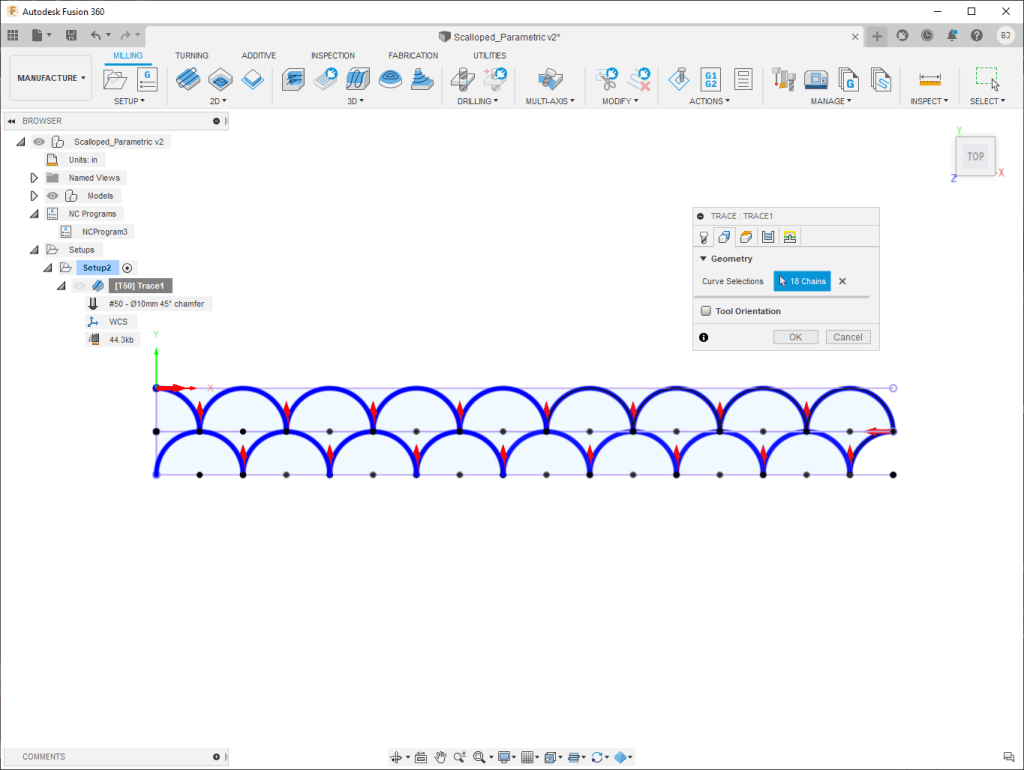
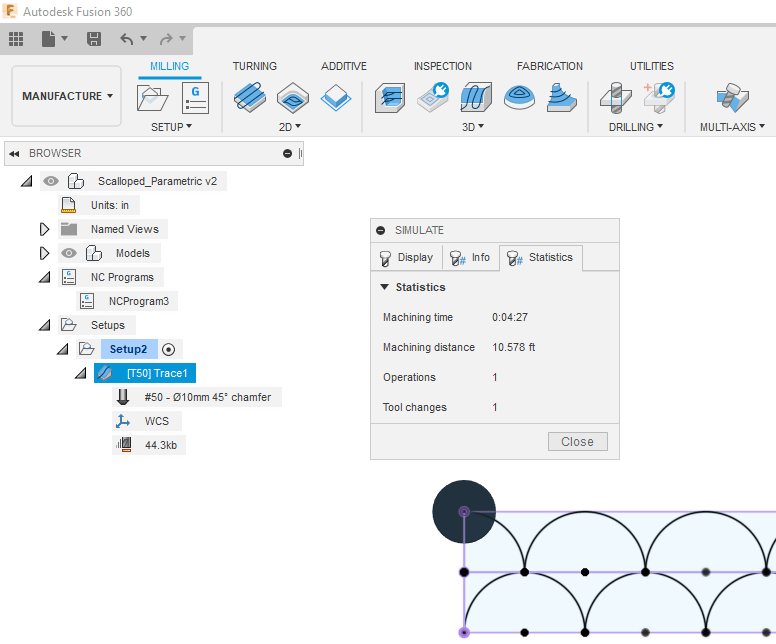
Generating gcode
I’m looking for an easier solution, but this works for now. Autodesk Fusion 360 is my preferred CAD/CAM package. When all you have is a hammer, everything looks like a nail…
I start with one sketch on the XY plane that outlines my work area (quilt width x by 5 inches y). I then make another sketch on top of that with my row heading down, then another sketch with the row coming back. Splitting into multiple sketches like this makes it easier to get the segment order right when selecting the contour for 2d trace. I pretend I’m using a 45 degree V bit.
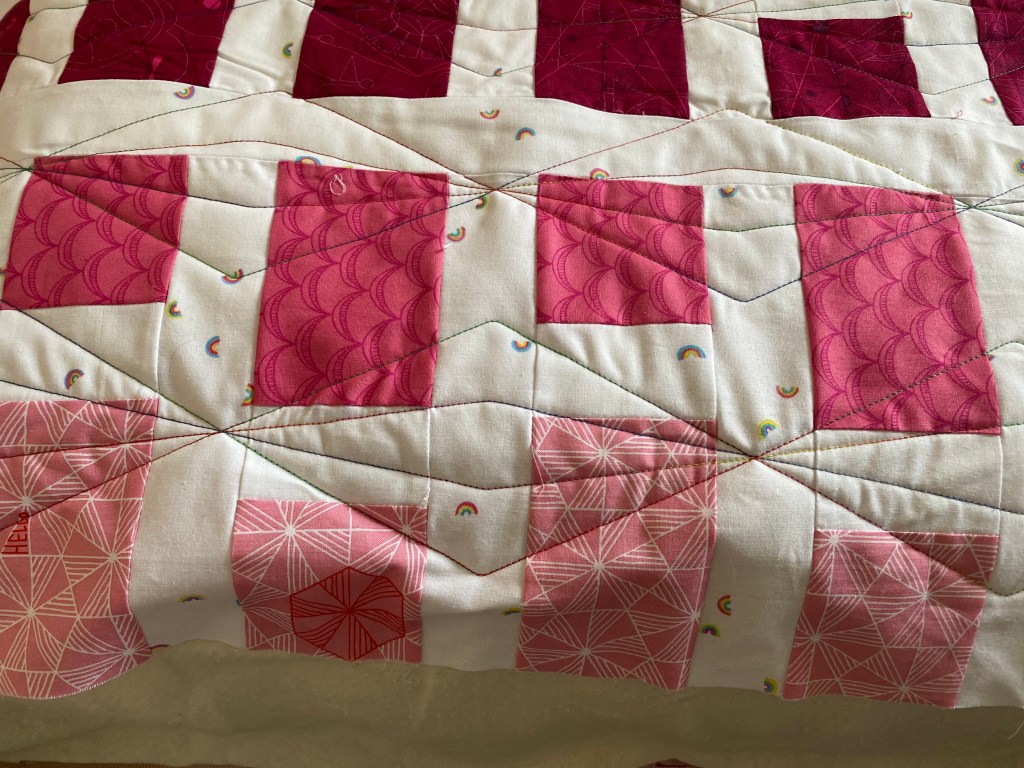
Work Samples
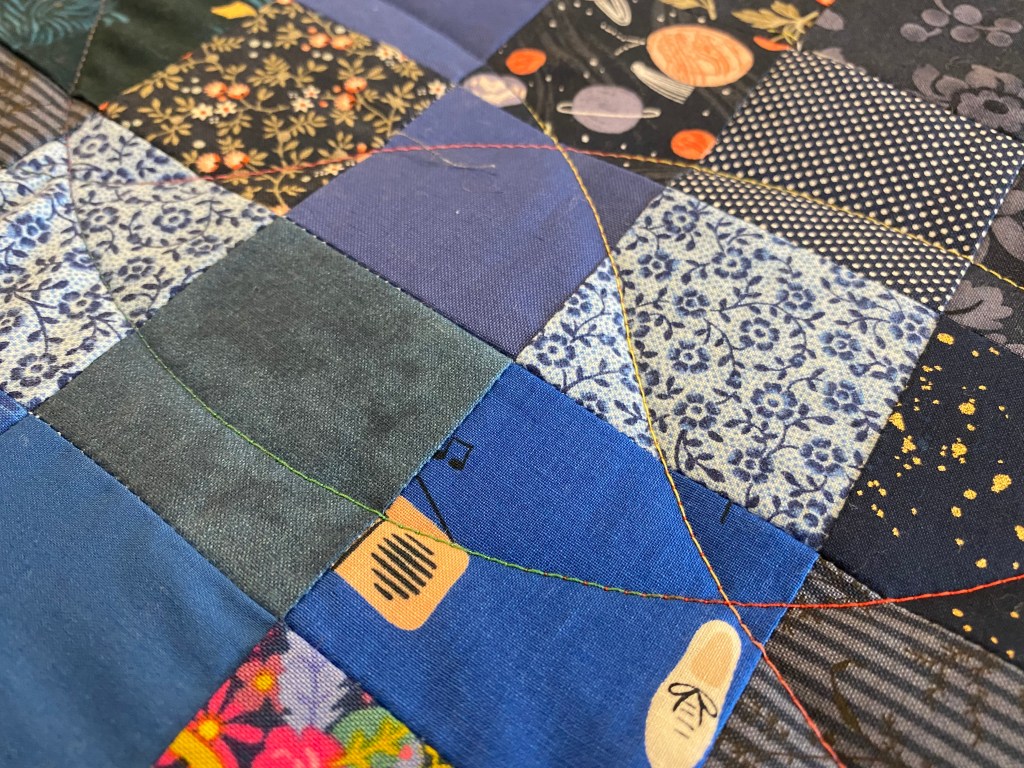
At first, a lot of inspiration came from WALK: Master Machine Quilting with your Walking Foot. Diamonds, zigzags, scallops are super easy (and very uniform)
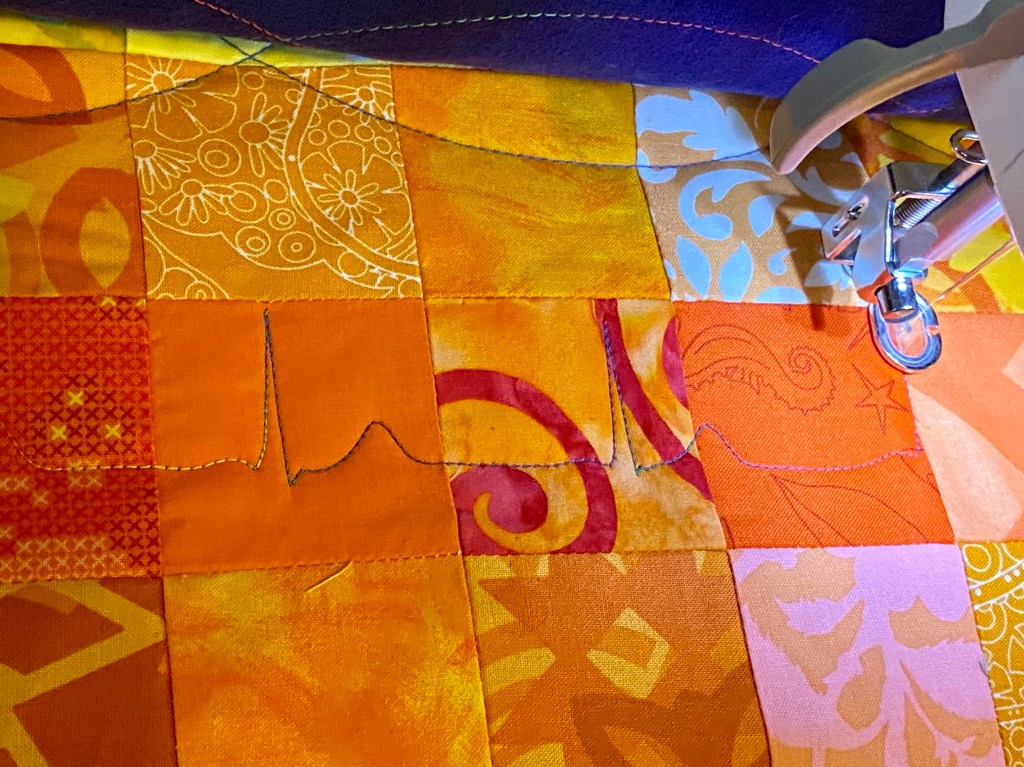
Eventually we branched out into things that can really only be done with CNC. That’s my wife’s heartbeat as captured by her Apple Watch, turned into a vector, used to quilt a blanket for our daughter. She literally put her heart into it.
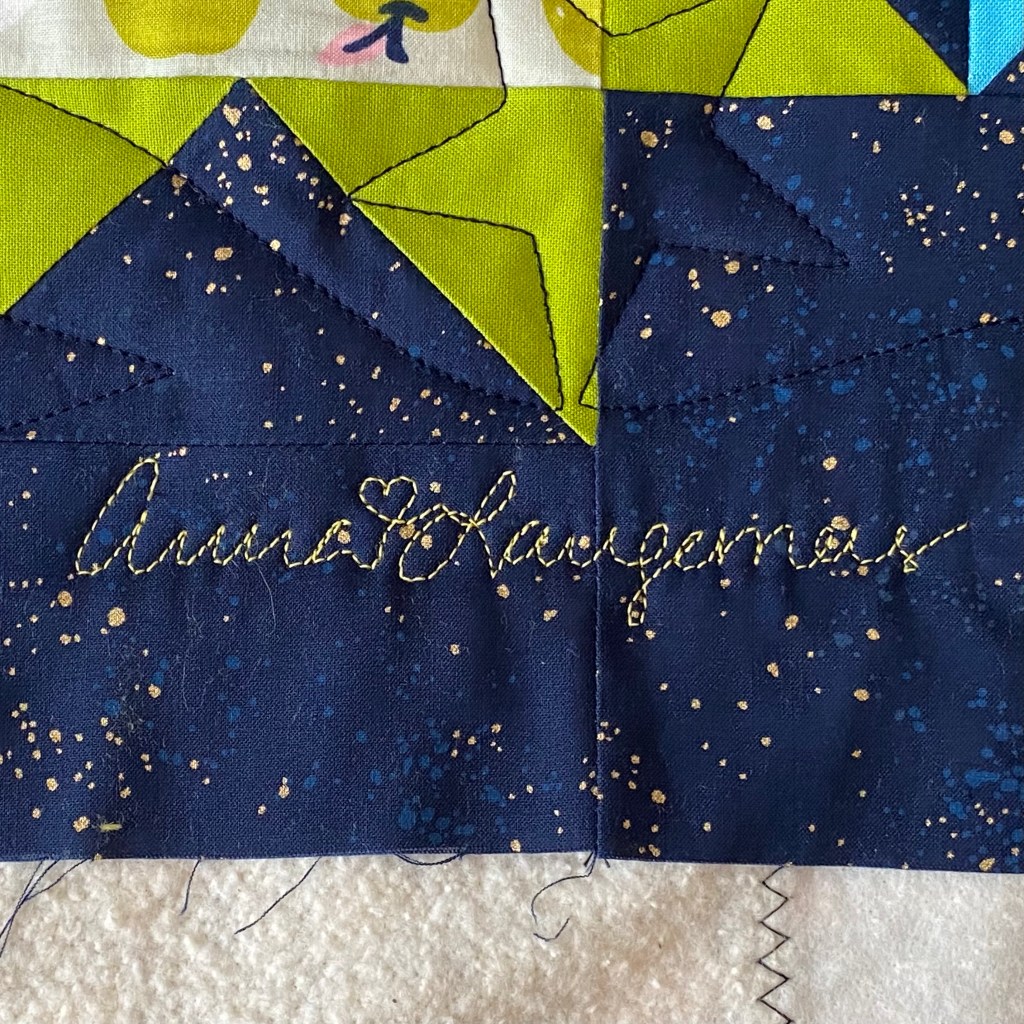
That’s my wife’s signature, vectorized and used to ‘sign’ her quilt in contrasting thread.
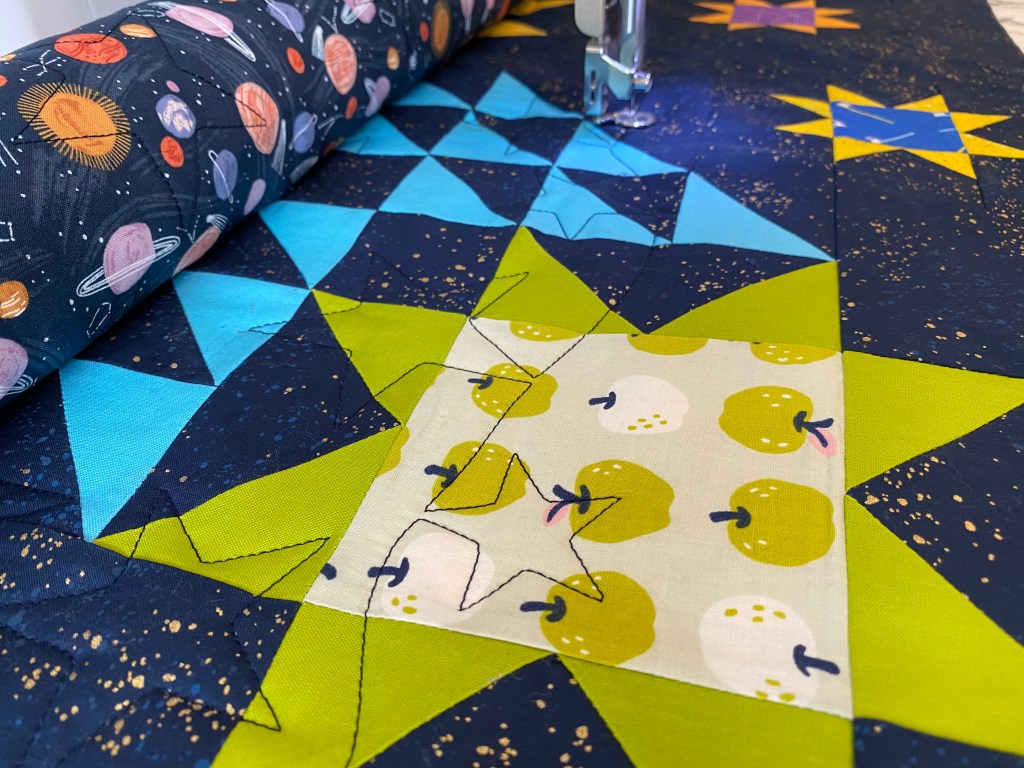
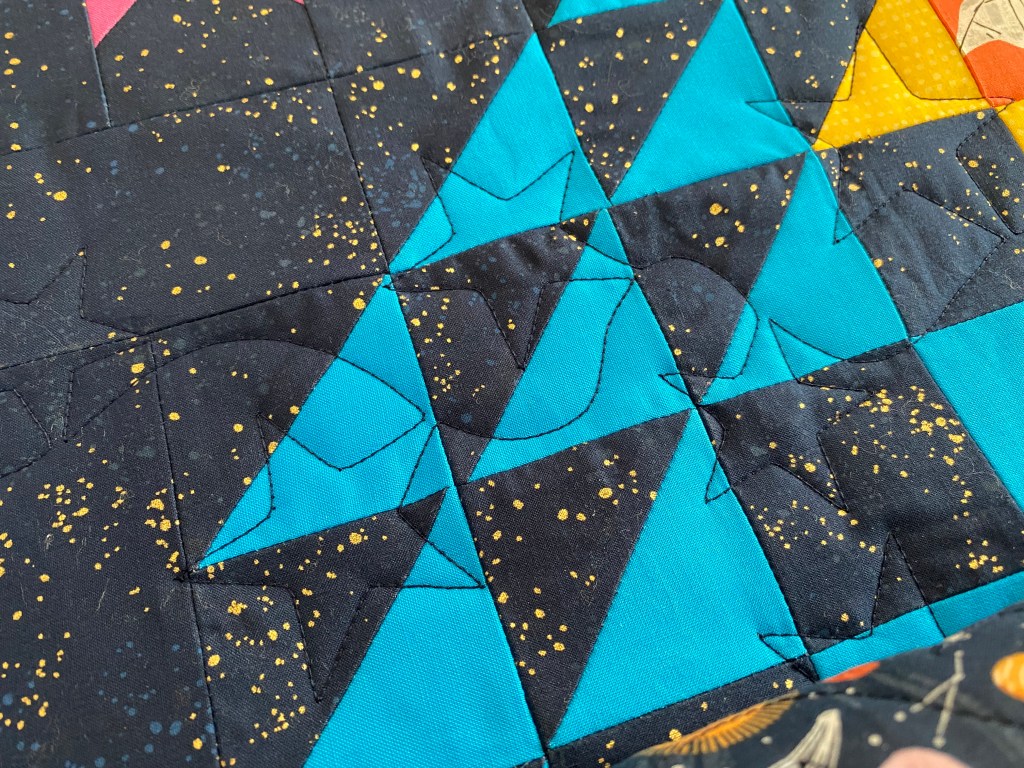
I drew a star pattern for the baby blanket for our son.
My Wife’s Quilting Instagram
My wife has all the talent for working with fabric and colors. I just do what I can to further enable her creativity. She shares a lot of her work on Instagram. Check it out to see more.
